Detailed Instructions For Netgear Nighthawk Wifi Extender Setup Via WPS Method
We say wifi extender you hear Netgear nighthawk wifi extender. It’s because it is one of the best wifi range extenders out there in the market. It offers such amazing features that no one can resist getting their hands on it. Though, an easy Netgear nighthawk wifi extender setup is one of the most advantageous benefits of this extender. Nighthawk extender setup can be done by various methods such as web browser method, nighthawk app method, and WPS method. But, this blog covers in detail the Netgear nighthawk Wifi extender setup via the WPS method.
WPS setup method is also known as WiFi Protected Setup allows you to set up your Netgear wifi extender without using the network name or SSID and passkey. But, keep in mind that not all wifi routers support the WPS push button so in that case, you can stop your reading here and continue with the setup using some other method.

Detailed Steps For Netgear Nighthawk Wifi Extender Setup Using The WPS Method -
- Firstly, set the Access point/extender toggle on your wifi extender to Extender, it has that.
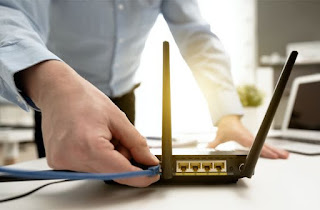
- Now, plug the Nighthawk wifi extender in the same room as the wifi router.
- The power LED indicator will light up.
- In case the power indicator is not lit then switch the extender on manually.
- Now, wait for the LED light indicators on your wifi extender to become steady as it might take up to a few minutes.
- If you are not a new user and you are setting up your Netgear Nighthawk wifi extender for the first time then make sure you have reset the device earlier.
- Now, hit the WPS button present on the wireless range extender and see if the WPS LED indicator is lit.
- Within the next 120 seconds, press the WPS push button on the wireless router as well.
- The WPS LED light on the Netgear nighthawk wifi extender will light up and become steady.
- Now, you must detach the wifi extender from its current power supply socket and plug it somewhere near the network dead spot region.
- Make sure the new area is closer to the wifi router and dead spot area as well.
- After plugging in the wifi extender, wait for the LED light indicators to light up.
- You can utilize the router Link LED to diagnose a spot where network signals are bad.
- The next step is to connect your PC device to the Netgear nighthawk wifi extender’s extended network.
- Make sure the password you have set for your Nighthawk wifi extender is the same as the password for your existing wifi router.
Netgear Nighthawk Wifi Range Extender Setup Wrapped Up!
The steps mentioned in the blog are very crystal clear and help you with exactly what you need to do with the Netgear nighthawk wifi extender setup. Make sure the power socket where you plug in the wifi extender is functional and provides a consistent power supply so that there is no hindrance in the connection. Yay! The Nighthawk extender setup is complete.


Comments
Post a Comment