Posts

Showing posts with the label tp link extender re210 setup

Simple Guidelines To Setup And Login TP-Link Range Extender

Image
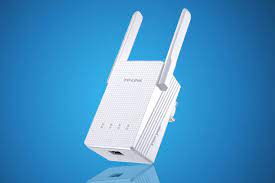
  TP-Link Range Extender is one of the best range extenders available in the market. It offers amazing network coverage in the bad network recipient zones as well. To use this extender all you need to do is set up and log in to the range extender. For TP-Link wifi extender login you must enter the correct login credentials. The TP-Link range extender password and username can be found on the left or right bottom of the range extender. Simple Guidelines To Do The TP-Link WiFi Range Extender Setup: The steps to perform the TP-Link range extender setup are mentioned below, just take care of two things while the setup, first the electrical socket where you plug in the extender must be properly functional, and secondly, the wireless extender should be in close vicinity to the wireless router while the setup is taking place so that there is no obstruction caused due to any other objects. The first step is to plug your TP-Link range extender into an electrical wall socket. T...

Step By Step Guidance For TP-link Extender RE210 Setup Via Tether App

Image
  TP-Link RE210 range extender is known for boosting speed incredibly and also increases network coverage. Now you can access the internet in those network dead spot zones as well. It offers a speed of up to 750mbps, which is again incredible. Another amazing feature is its color-changing LED indicator which indicates the signal strength. To enjoy such fancy features you need to do the TP-Link RE210 setup . By this, you can experience faster and wider coverage of the internet. TP-Link extender RE210 setup is an easy process, it does not offer any complicated guidelines to set up the device. Tether App helps in setting up the device very conveniently. This article explains everything about the TP-Link extender RE210 setup , via the Tether App. Easy Guidelines To Set Up TP-Link RE210 setup: The initial step is to unbox the TP-Link RE210 wifi repeater. Now associate the antennas of the router with the extender. Make sure you have placed your extender in a perfect place. Aft...

Learn How To Connect Wifi Extender To Router Without WPS

Image
  Nowadays, most devices come with a WPS button or option. And, it is easier that way to connect your extender to your wifi network.  But, you do not need to go all dismayed when your extender does not support the WPS option. We will guide you on    how to connect the wifi extender to the router without WPS . Keep reading the blog if you want to set up an extender to the  router without WPS.    Guide To The Physical Setup Of The Wifi Extender; Before connecting the device to the router you need to make sure it is working. So start with the physical setup of the wifi extender by  following the steps mentioned below: First, you have to make sure that your device is connected to an active and stable internet connection. Detach your computer system from the network, and then continue. Your wifi router and the wifi extender should be placed closely so that there are no obstructions in between.  You must switch on your wifi extender next. The wifi...

All You Need To Know About TP-Link RE210 Setup

Image
  Annoyed with the unreachable signals of your wifi router? Time for adapting a new range extender that fulfills your needs to have amazing signal strength and excellent network coverage. The TP-Link Re210 is appropriate for bijou home and office places. With a 433 Mbps network speed, it has become a user’s favorite in a short period. The extenders do not just work merely by plugging into the wall socket, they require a proper setup. Similarly, the TP-Link RE210 Extender setup is a prerequisite. TP-Link RE210 Setup is done differently using two different options.  These are; Using the Wifi protected setup i.e. WPS button. Using the web browser.                                                         ...