Step-By-Step Guide For Netgear Nighthawk Login
Netgear Nighthawk Wifi Extender Setup is mandatory to use your Netgear extender to extend the signals of your wifi router. The Nighthawk extender setup is done using two different methods. The Netgear users find it super-easy to set up the router using the Nighthawk app. So, in this article, we have mentioned easy steps to do the Netgear Nighthawk wifi extender setup.

Easy Methods To Do Netgear Nighthawk Wifi Extender Setup -
- Nighthawk Extender Setup Via WPS Method:
For Netgear wifi extender setup using the WPS method, you need to make sure that the wifi router and the extender both support the WPS button on them. Now follow the guidelines to start the setup;
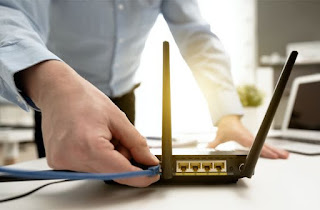
- Start by plugging your Netgear Nighthawk wifi extender into a properly working power supply outlet.
- Then, position your Nighthawk wifi extender close to the wifi router for a smooth connection.
- Wait for the power LED to turn stable green. Though, the color of the power LED light depends on different models of the Netgear wifi extender.
- Now, press the WPS button on the extender and wait for the wifi light to flash.
- After pressing the WPS button on your wifi range extender press it on the wifi router within the next few minutes.
- Wait for at least 10 minutes to establish a proper connection.
- After the connection is established, you can relocate your Netgear wifi extender to a location where signals don’t reach properly.
- Afterward, connect your PC device or mobile phone to the extended wifi network.
- Nighthawk Extender Setup Via Manual Method:
- First of all, plug your range extender into an electrical socket and then turn it on.
- Make sure you plug your Netgear wifi extender in close vicinity to your wifi router for a better connection.
- Look for the power LED to light up.
- Establish a connection between your wifi router and wifi extender using ethernet wired or wifi.
- Open a web browser that you use most and then in the address field enter the web address
www.mywifiext.net and hit the enter button to launch the web page.
- Once you hop on the Netgear extender login page, fill in the default login information, and then hit the login tab to proceed.
- To set up and configure the settings of the Netgear wifi extender follow the on-screen guidelines.
- Once the setup is complete, move your wifi range extender to a new location where the signals of the wifi reach less.
Easy Steps To Perform The Netgear Nighthawk Login -
Once you have set up your Netgear nighthawk wifi extender setup, proceed to log in to your extender so that you can manage and alter the settings of your wifi extender. Once you log in you can also keep a check on the network status of the wifi extender;
- Start by switching on your PC device.
- Then, launch a web browser of your choice, it could be Google chrome, firefox, opera, etc.
- In the web address bar, enter the web address
www.mywifiext.net and hit the enter key.
- This will open the Netgear wifi extender login page on your screen.
- You must input the username and password of the Netgear wifi extender to log into the admin panel of the wifi extender.
- Hit the Login tab.
- That’s it! You are now logged in to the wifi extender.
Netgear Nighthawk Wifi Extender Logged In!
After following the easy instructions for Netgear Nighthawk wifi extender setup you can extend the signals to enjoy a faster and better internet. While doing the Nighthawk extender setup, keep in mind to plug the extender into a functional AC outlet because the setup might fail if the electricity supply is not consistent. Enjoy the extended and enhanced signals.


Comments
Post a Comment