Overview Of MSRM WiFi Extender Setup | MSRM Setup
MSRM wifi extender is environment friendly, safe, and portable. It dispenses high and stable internet speed and is compatible with wifi-enabled devices such as computers, laptops, or smartphones. What makes it a hit is, its convenient and hassle-free installation. It is easy to set up and install. MSRM wifi extender setup can be done with a few easy steps. For the MSRM setup keep yourself glued to this article and find the right solution.

There are two ways to set up the MSRM wifi range extender;
- Using A Web Browser
- Using The WPS Button
Steps To Set Up MSRM WiFi Range Extender Using A Web Browser:
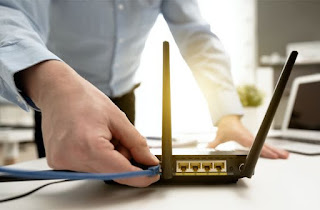
Step 1: Locate the network dead zones of your home and then place the MSRM wifi extender there.
Step 2: On your MSRM wifi range extender, there are power lights, wait for them to be steady. Now take your PC device or smartphone.
Step 3: Now, navigate to the wifi settings from your device and then connect to the MSRM by clicking on its default SSID i.e. ‘Wireless-N’ or ‘Wireless-AC’.
Step 4:Thee first-time connection won’t require any passkey and might show ‘NO Internet’ after the connection is made.
Step 5: The next step is to launch the default browser of your device. You might automatically be redirected to the ap.setup page.
Step 6: In case, it is not automatically reached, then, enter http://ap.setup or http://192.168.10.1 manually in the address field or bar.
Step 7: Choose the setup mode according to your preference, extender/repeater. Hit the next button after that.
Step 8: In the username and password field, enter ‘admin’ Make sure it is in lower case only.
Step 9: Now choose the wireless network you want to extend and then enter its username and password in its respective field.
Step 10: Reboot the MSRM wifi range extender and then the setup will be complete.
Step 11: Try to establish a connection between your extended network and other devices.
Steps To Do The MSRM Wifi Range Extender Setup Using The WPS Option:
Step 1: The setup using the WPS button is the easiest and quickest. It takes only 15 seconds to complete the setup process.
Step 2: Just plug the MSRM wifi range extender near the wifi router.
Step 3: Once the power LED light on the extender turns steady. Press the WPS button available on the wireless router. This seems like two arrows circling together.
Step 4: The next step is to push the WPS button on the wireless router within 1 or 2 minutes and you will observe the lights flashing on both devices.
Step 5: After the configuration is successful, the WPS LED light on the wifi router will stop flashing, whereas it will turn stead on the extender.
Step 6: Finally, navigate to the wifi settings where wifi devices are enlisted. Enter the same password as your wifi range extender and connect to it.
MSRM Setup Successfully!
The MSRM setup is complete now! MSRM wifi extender setup is so easy and quick to do. The steps mentioned above are very descriptive and easy to perform. So next time if you do the MSRM extender and need help you know where to stop by. Enjoy the extended network of your MSRM wifi range extender.


Comments
Post a Comment